The complete PowerMac G5 PC 2.0 Build Log
Published
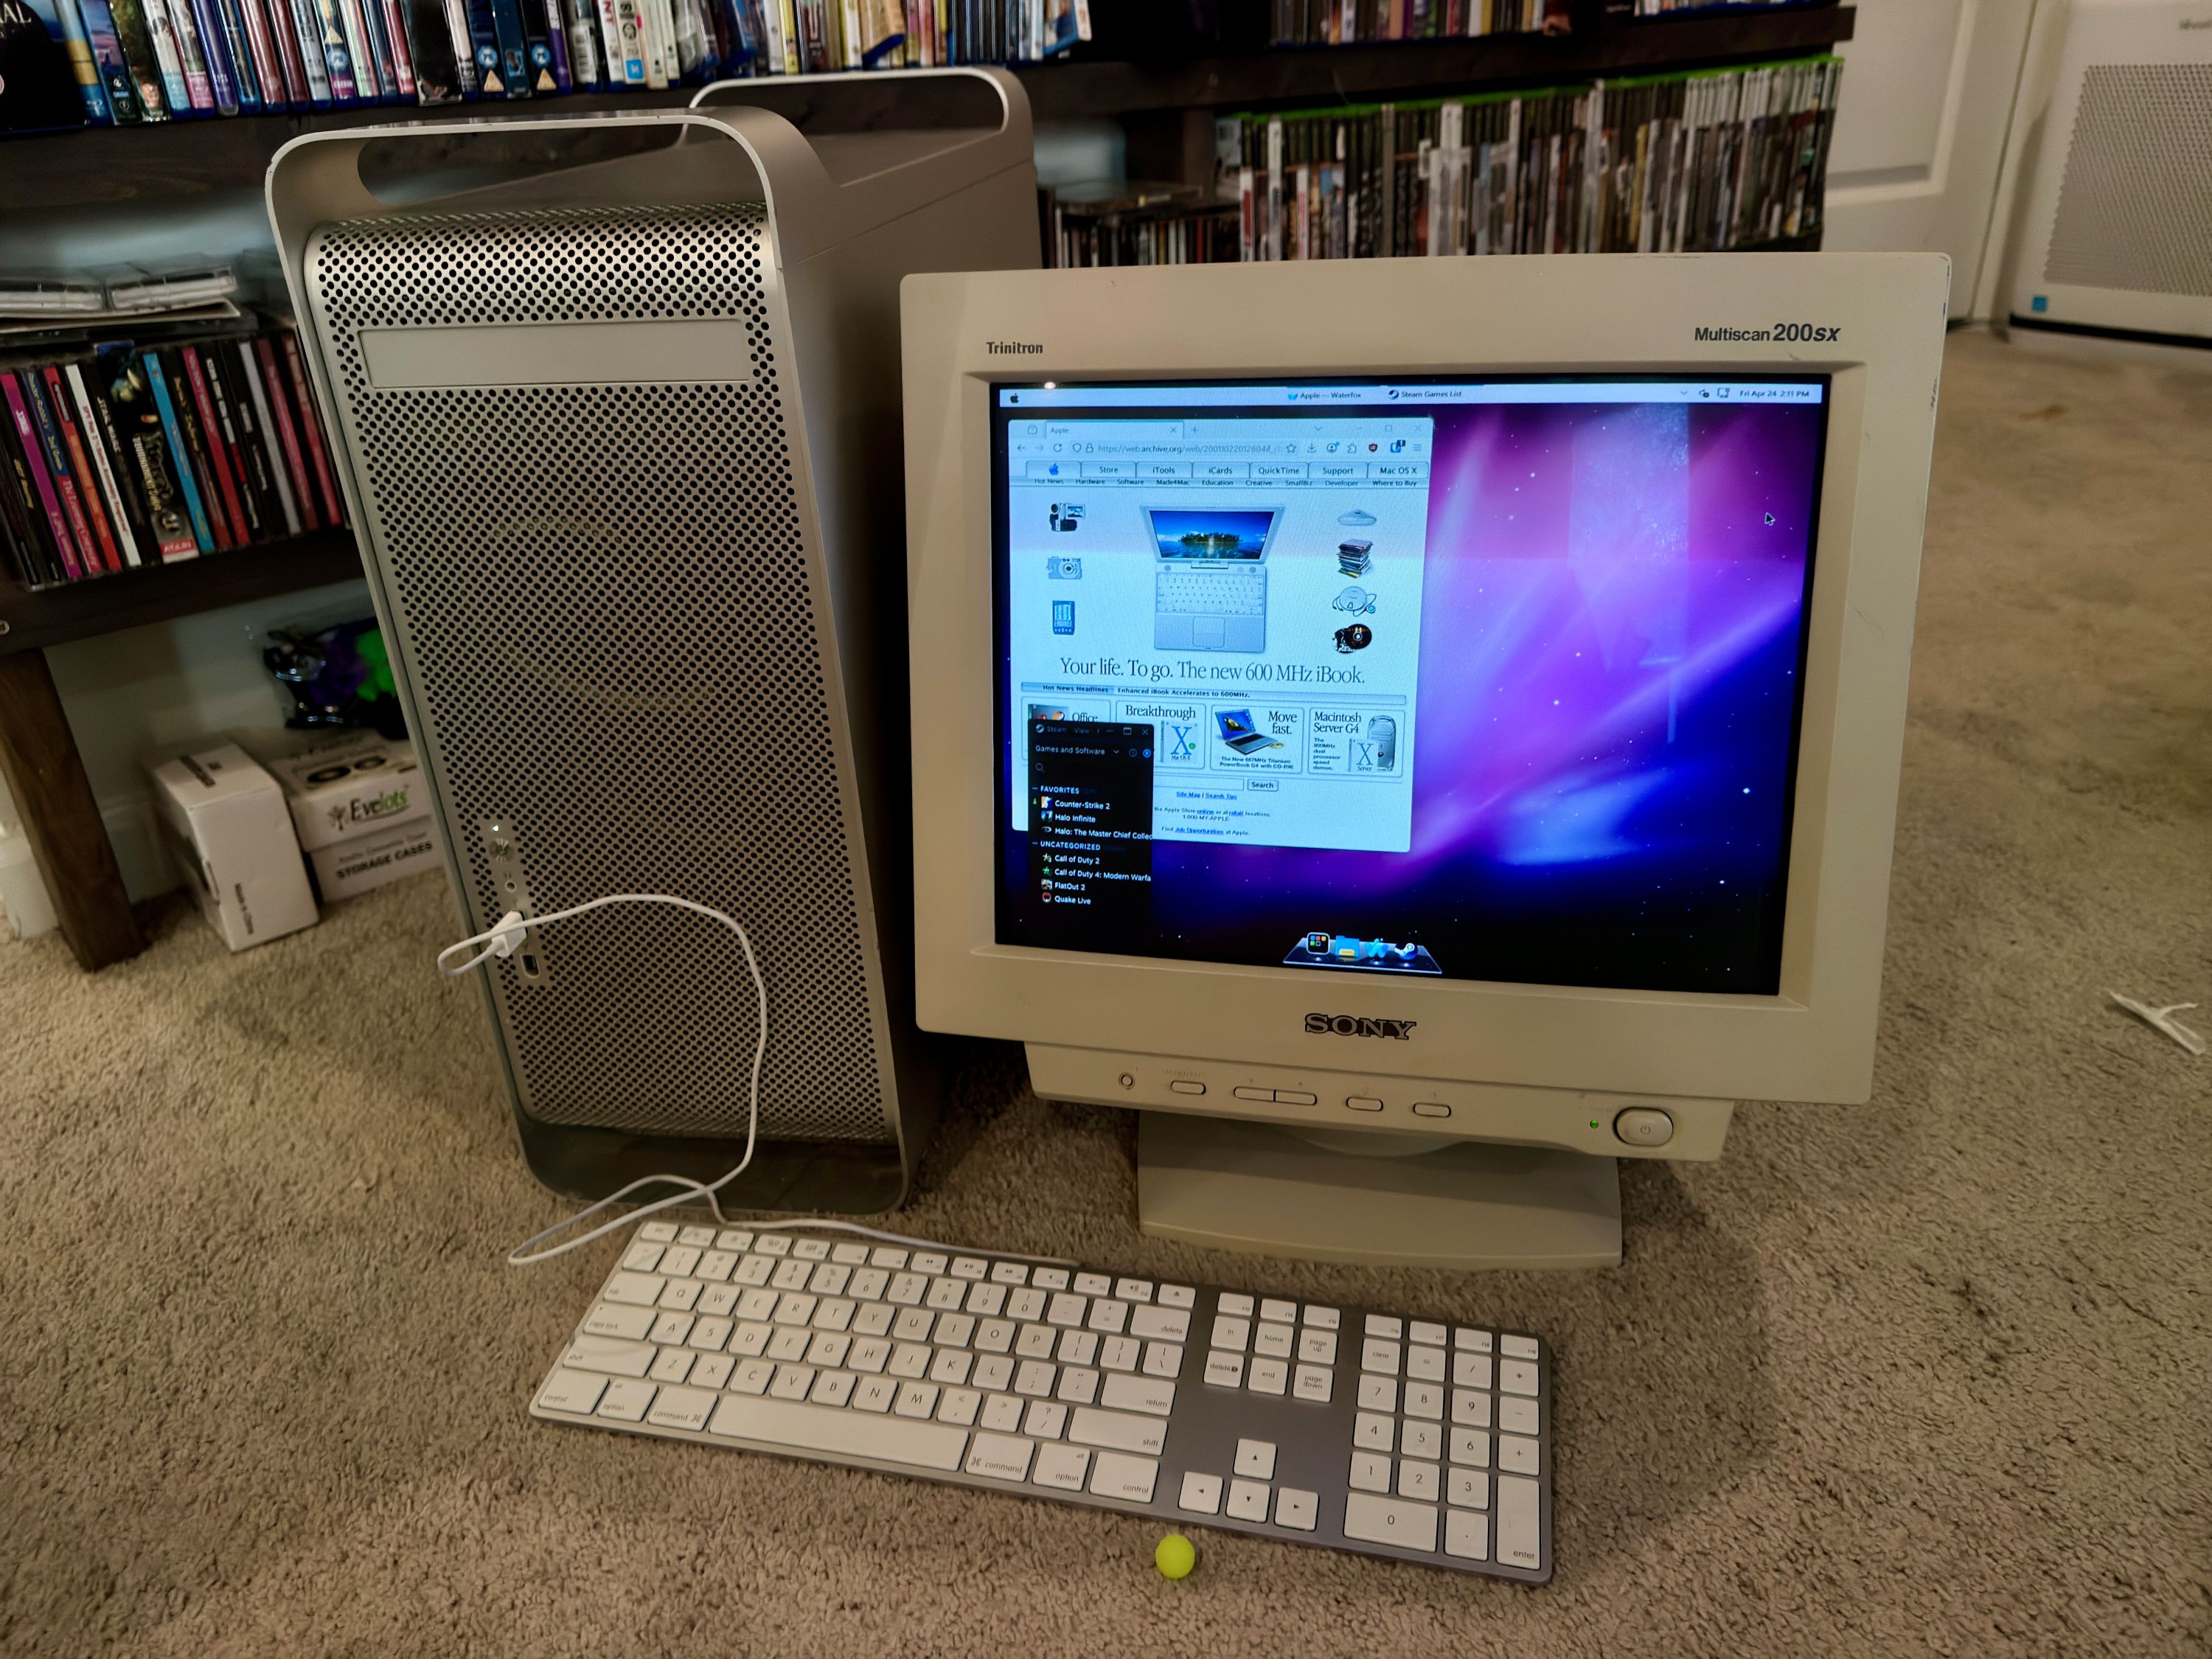
I have an old PowerMac G5 that I picked up from the university surplus a decade ago and crudely transplanted a Dell OptiPlex desktop into. I have all the guts from my old desktop left over from last year's upgrade, so I wanted to revive the old case mod but with my current-day tools and abilities.
I gave myself a deadline of having this ready for IndySmashFest to make sure I would finally actually work on it. And lo, I finished with a week to spare!
Let's just start off with a photo of the completed build to show what we're working forward, and I'll talk through the design of the various components that went into making this.
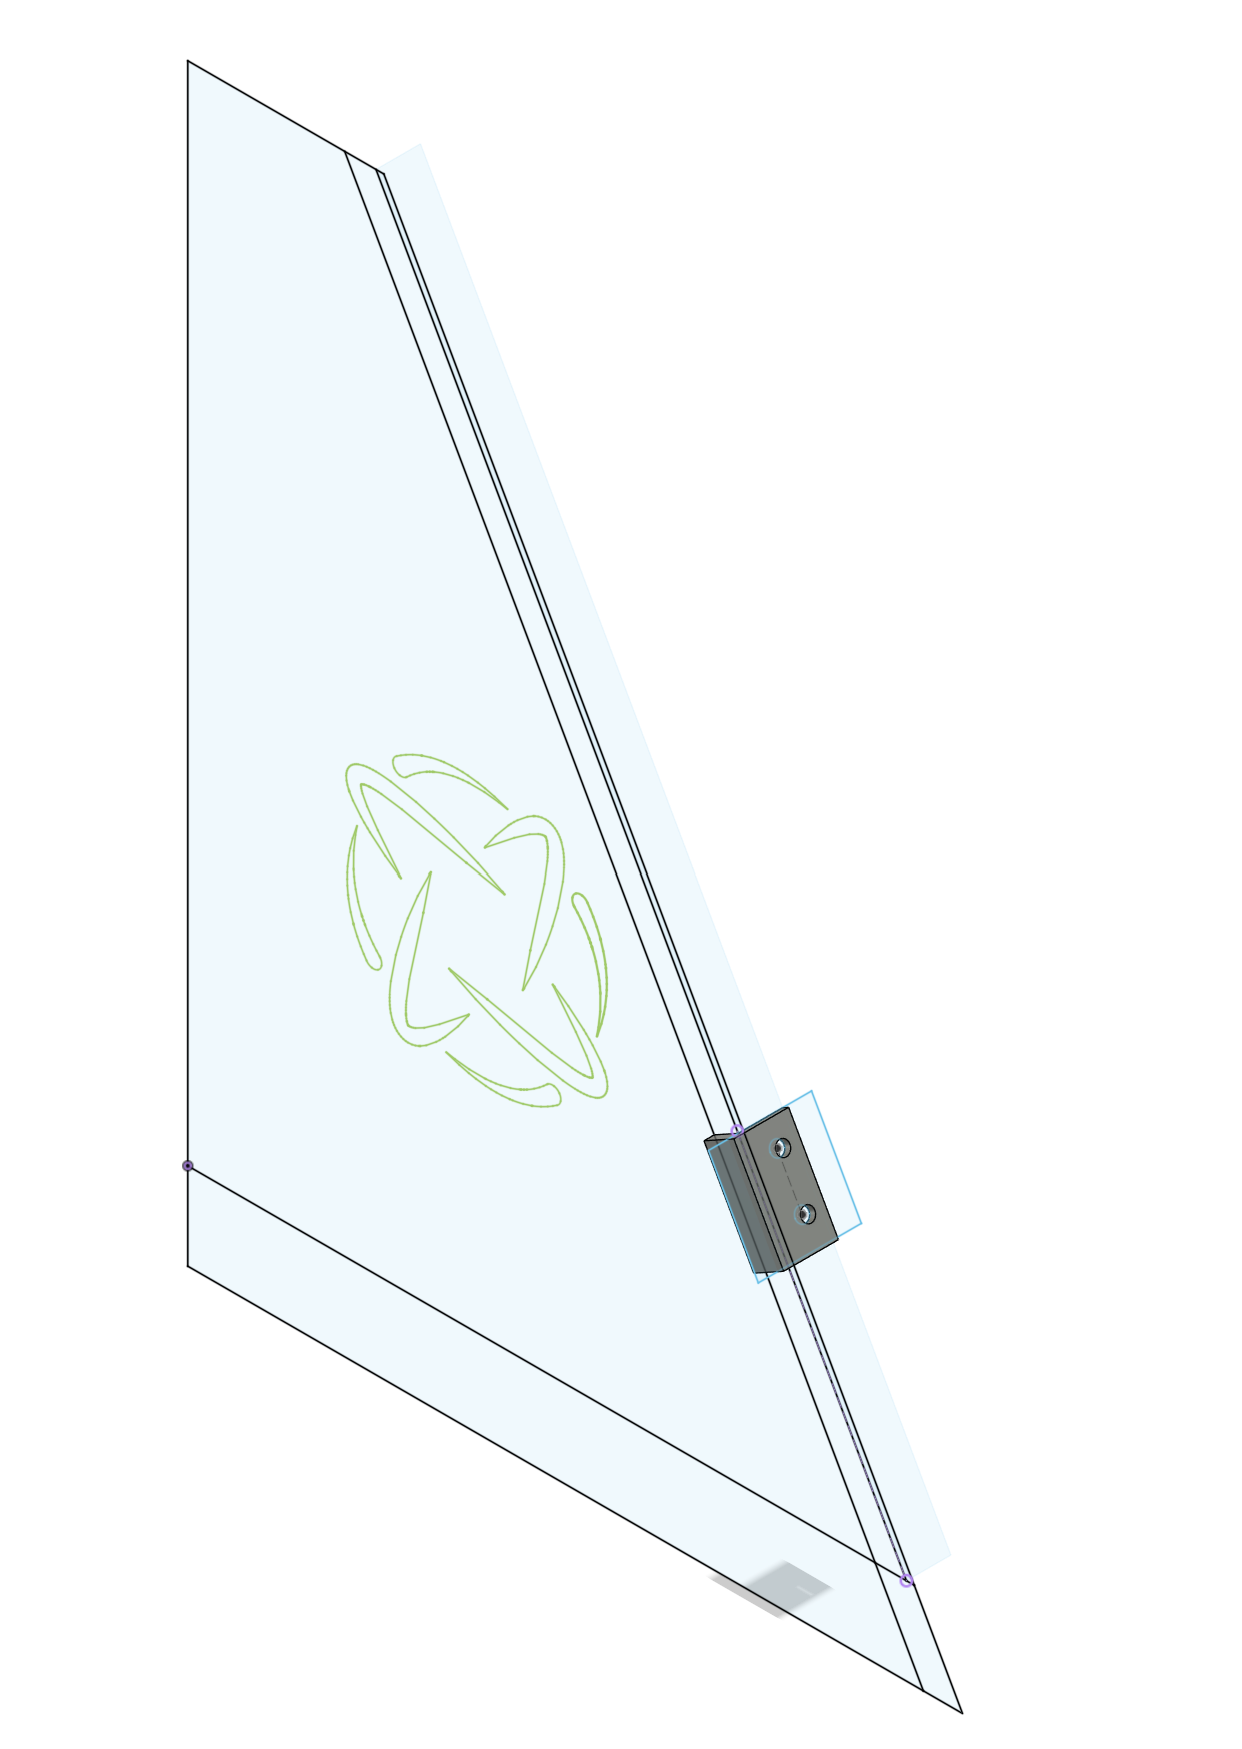
Mounting the Motherboard
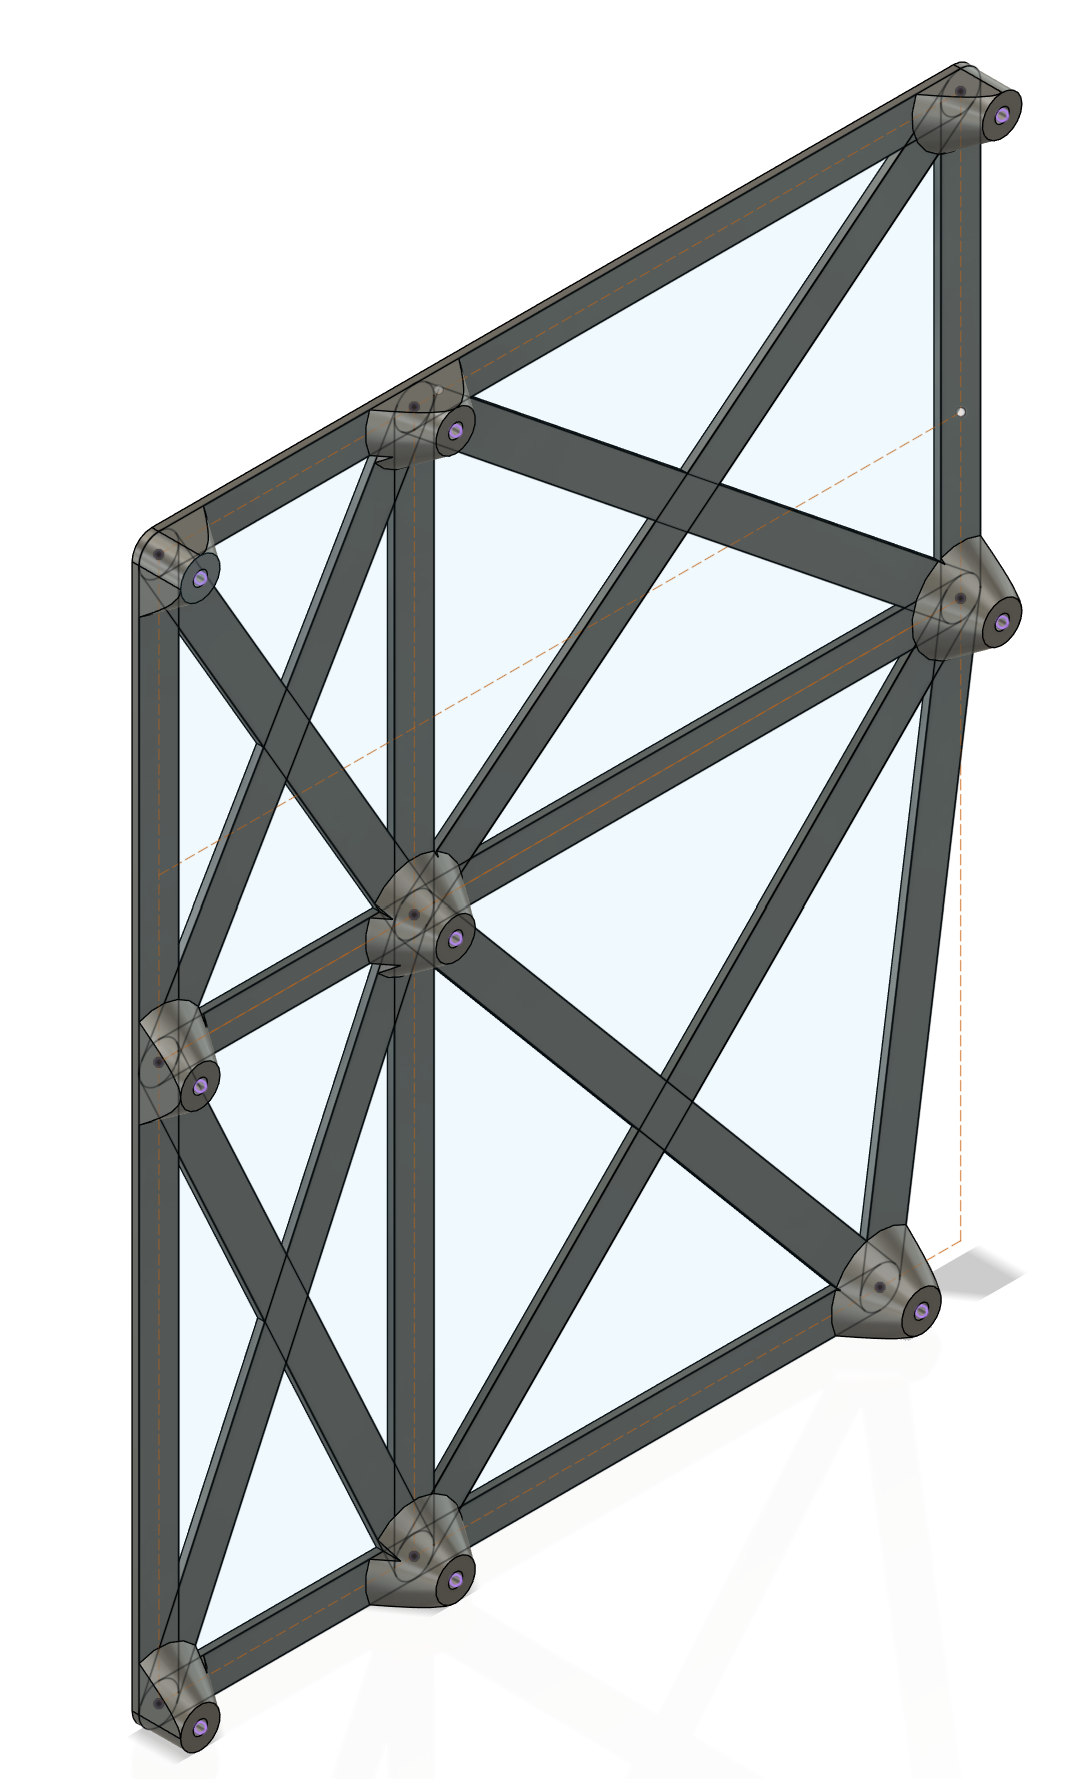
After I pulled all the old guts out and test fitting new components, the first thing I wanted to figure out was mounting the motherboard. Back in the ancient times, I just pulled the original standoffs out, screwed them into the motherboard for alignment, then slapped them back in the chassis with a dab of JB weld on the bottom of each post. While this didn't technically fail, over half of those posts broke off which did not inspire confidence.
And so, for V2, I wanted to make sure there was a lot more surface contact with the back of the case if I were to glue this thing in. I looked up dimensions for ATX motherboards and created a sort of skeleton around that. I wanted to leave enough room underneath for some smaller cables to run. I ended up going through two revisions to get it lined up so that the GPU would sit at just the right height to meet up with the expansion slots in the back of the case.

- step
- 182g
- total
- 182g
Figuring Out Cooling
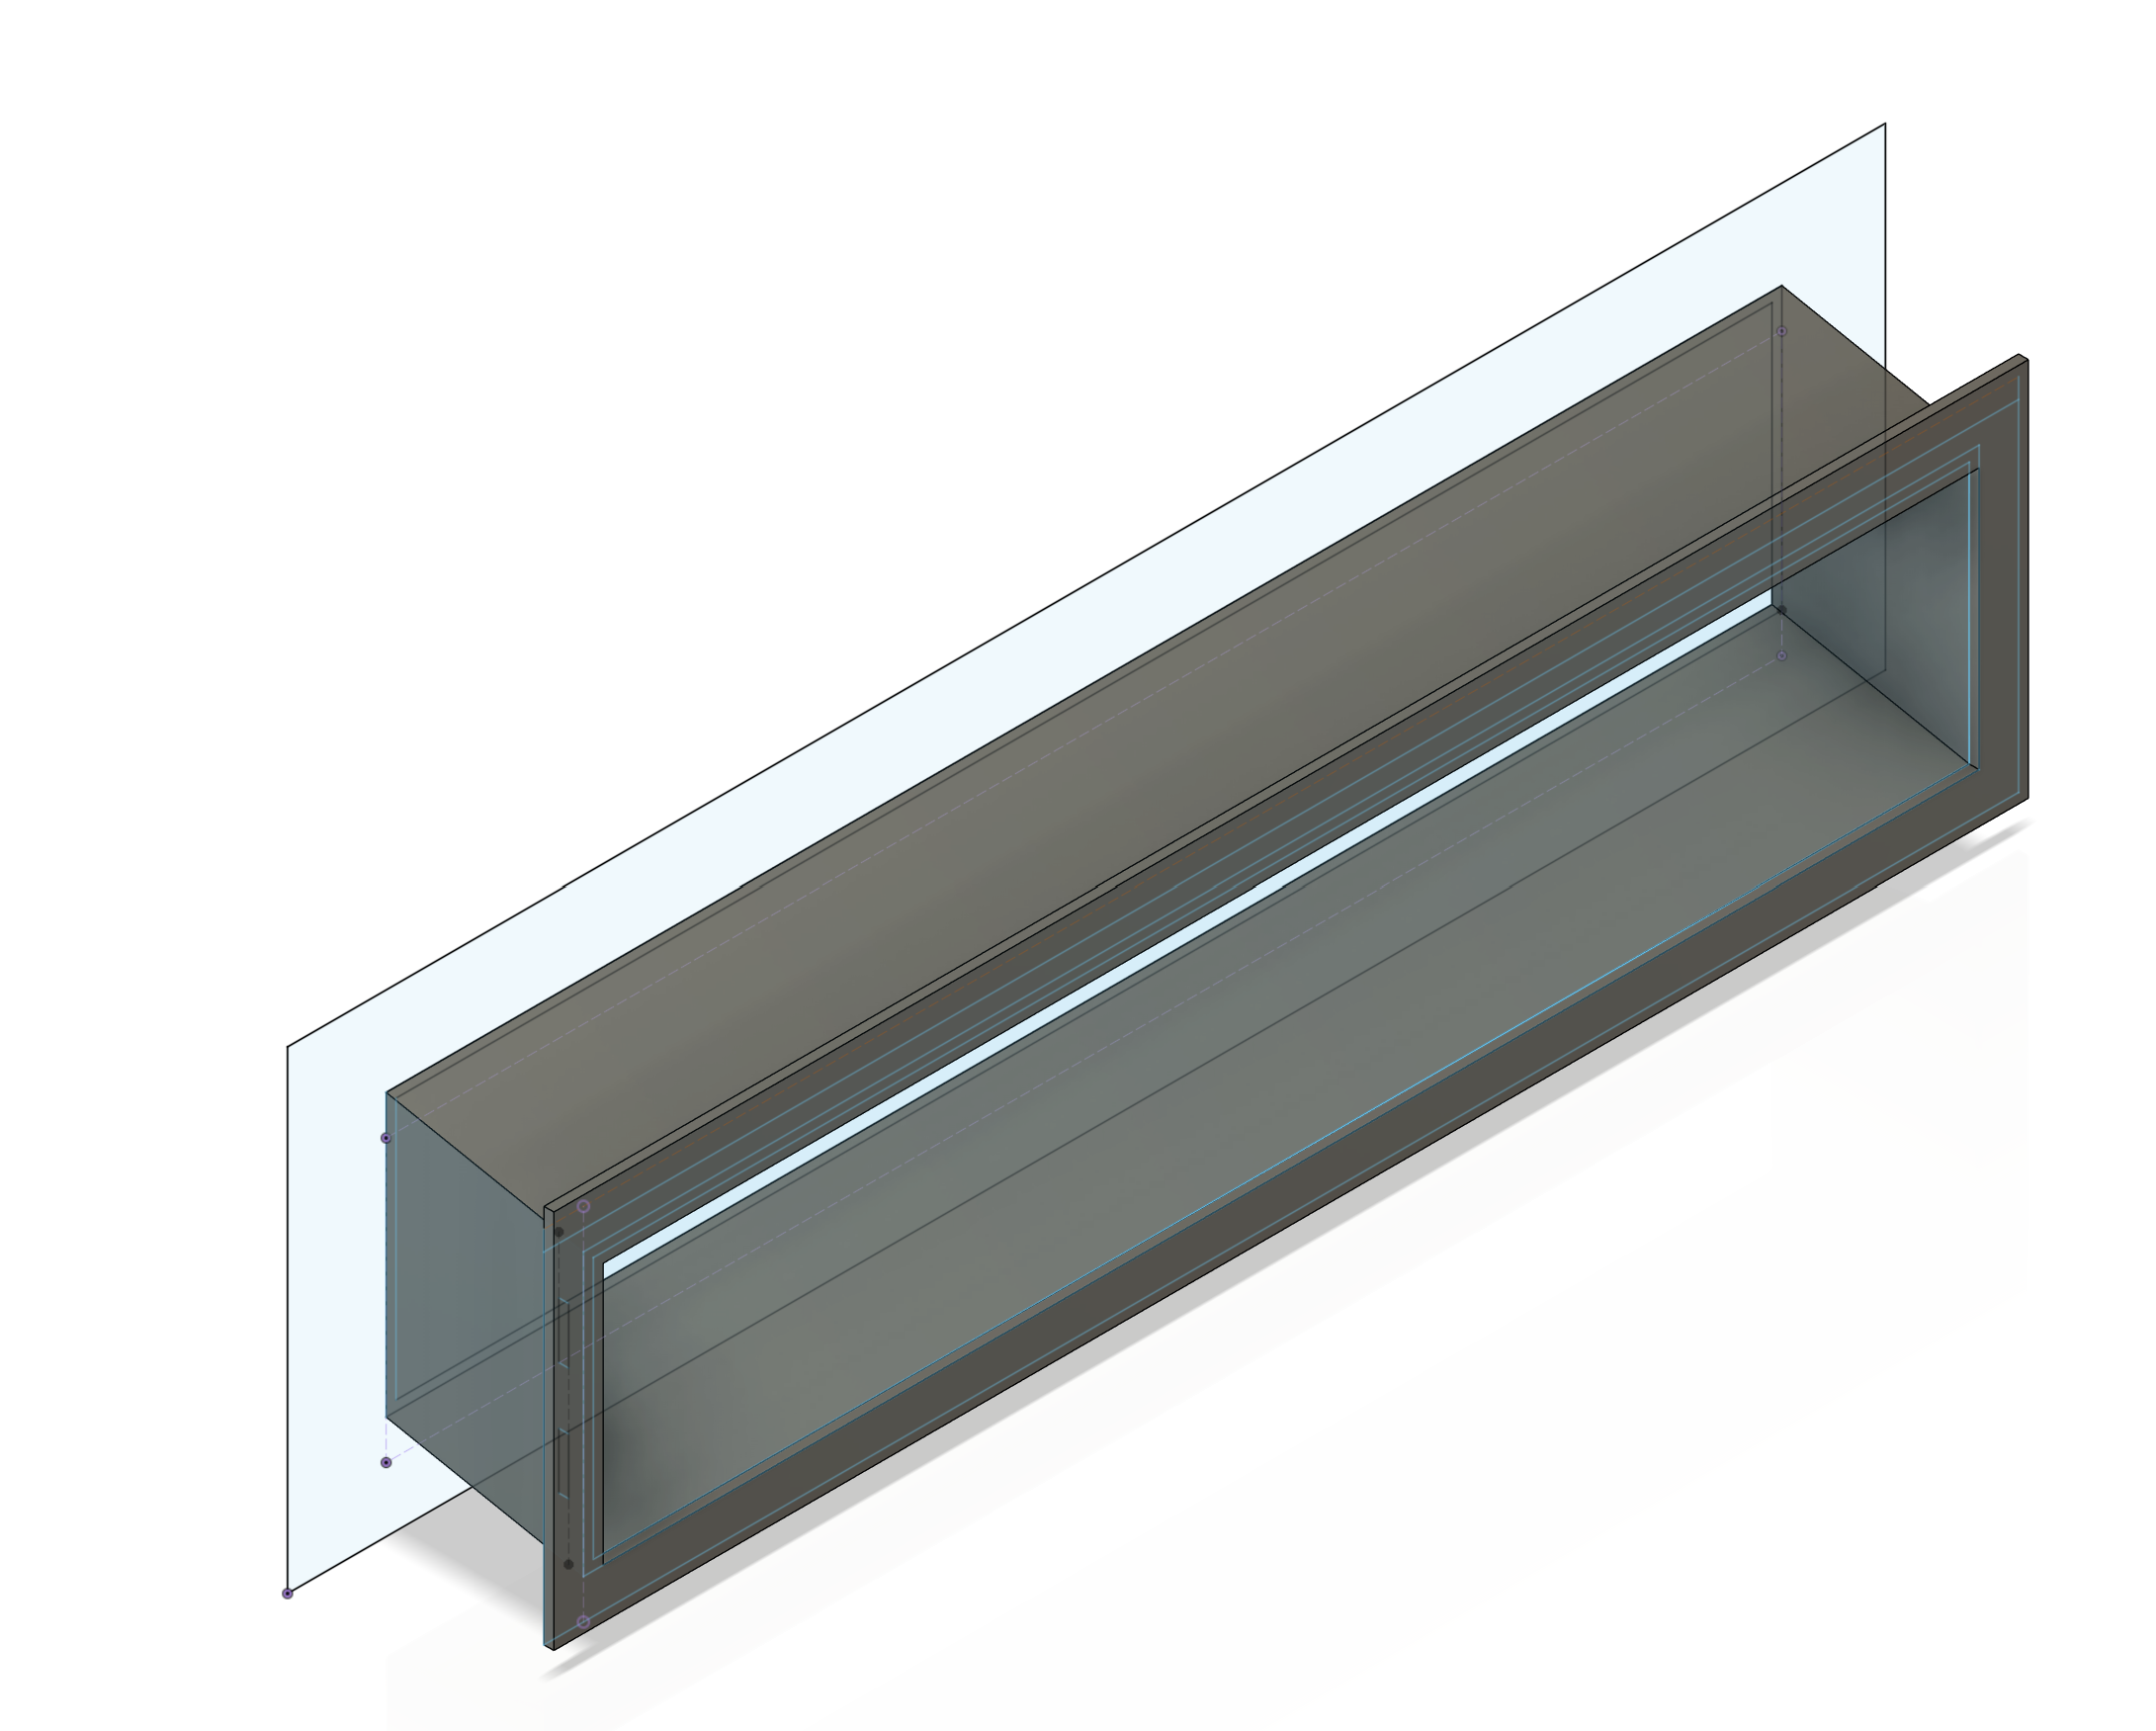
Up next, I needed to figure out cooling. I had a 360mm radiator (using this because it's what I had lying around, a 280mm definitely would have been significantly easier) that didn't really fit in the case, and the stock fan mounting points for the exhaust would intersect with the motherboards bulky I/O shield. I tackled the exhaust first.
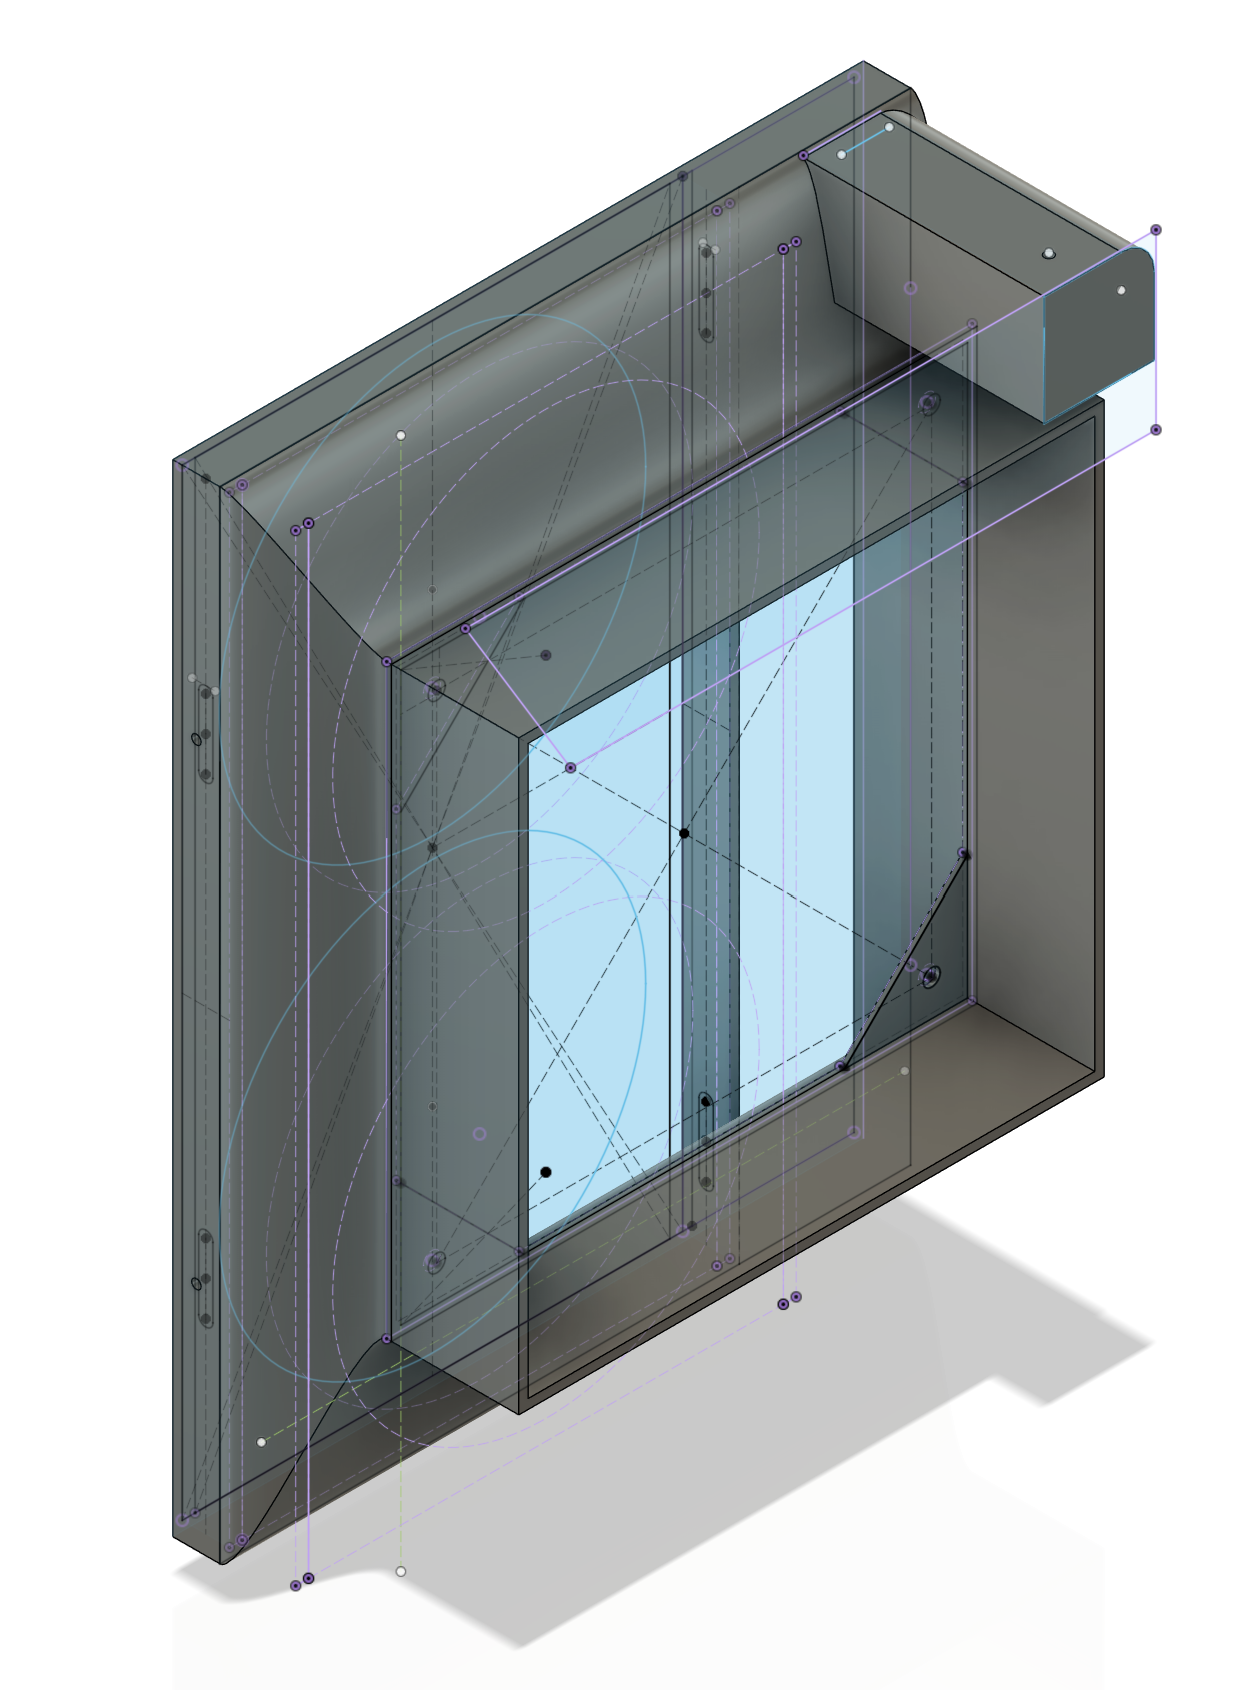


I made a design that wraps around the factory grilles from Apple and lofts up to hold a standard 120mm fan. I included screw holes for the fan and grille, but everything ended up just friction fitting very nicely so I didn't make use of them in the end. This was a super-tight squeeze between the I/O shield and the top of the case so I was exceedingly pleased with how it turned out. The Overture ASA I used for my prints also closely matches the factory plastic parts from apple so it worked out well.
On my second revision, I tossed in a little post for the original "G5" aluminum vanity plate to mount onto. You'll see that further down.
- step
- 206g
- total
- 388g
Now it was time to deal with the radiator. This 360mm radiator really should not go in this case, but I was determined to make it work. I ended up mounting it diagonally with the top toward the front so that there would be room for bigger GPUs up top. This would make things a really tight squeeze by the power supply (more on that later).
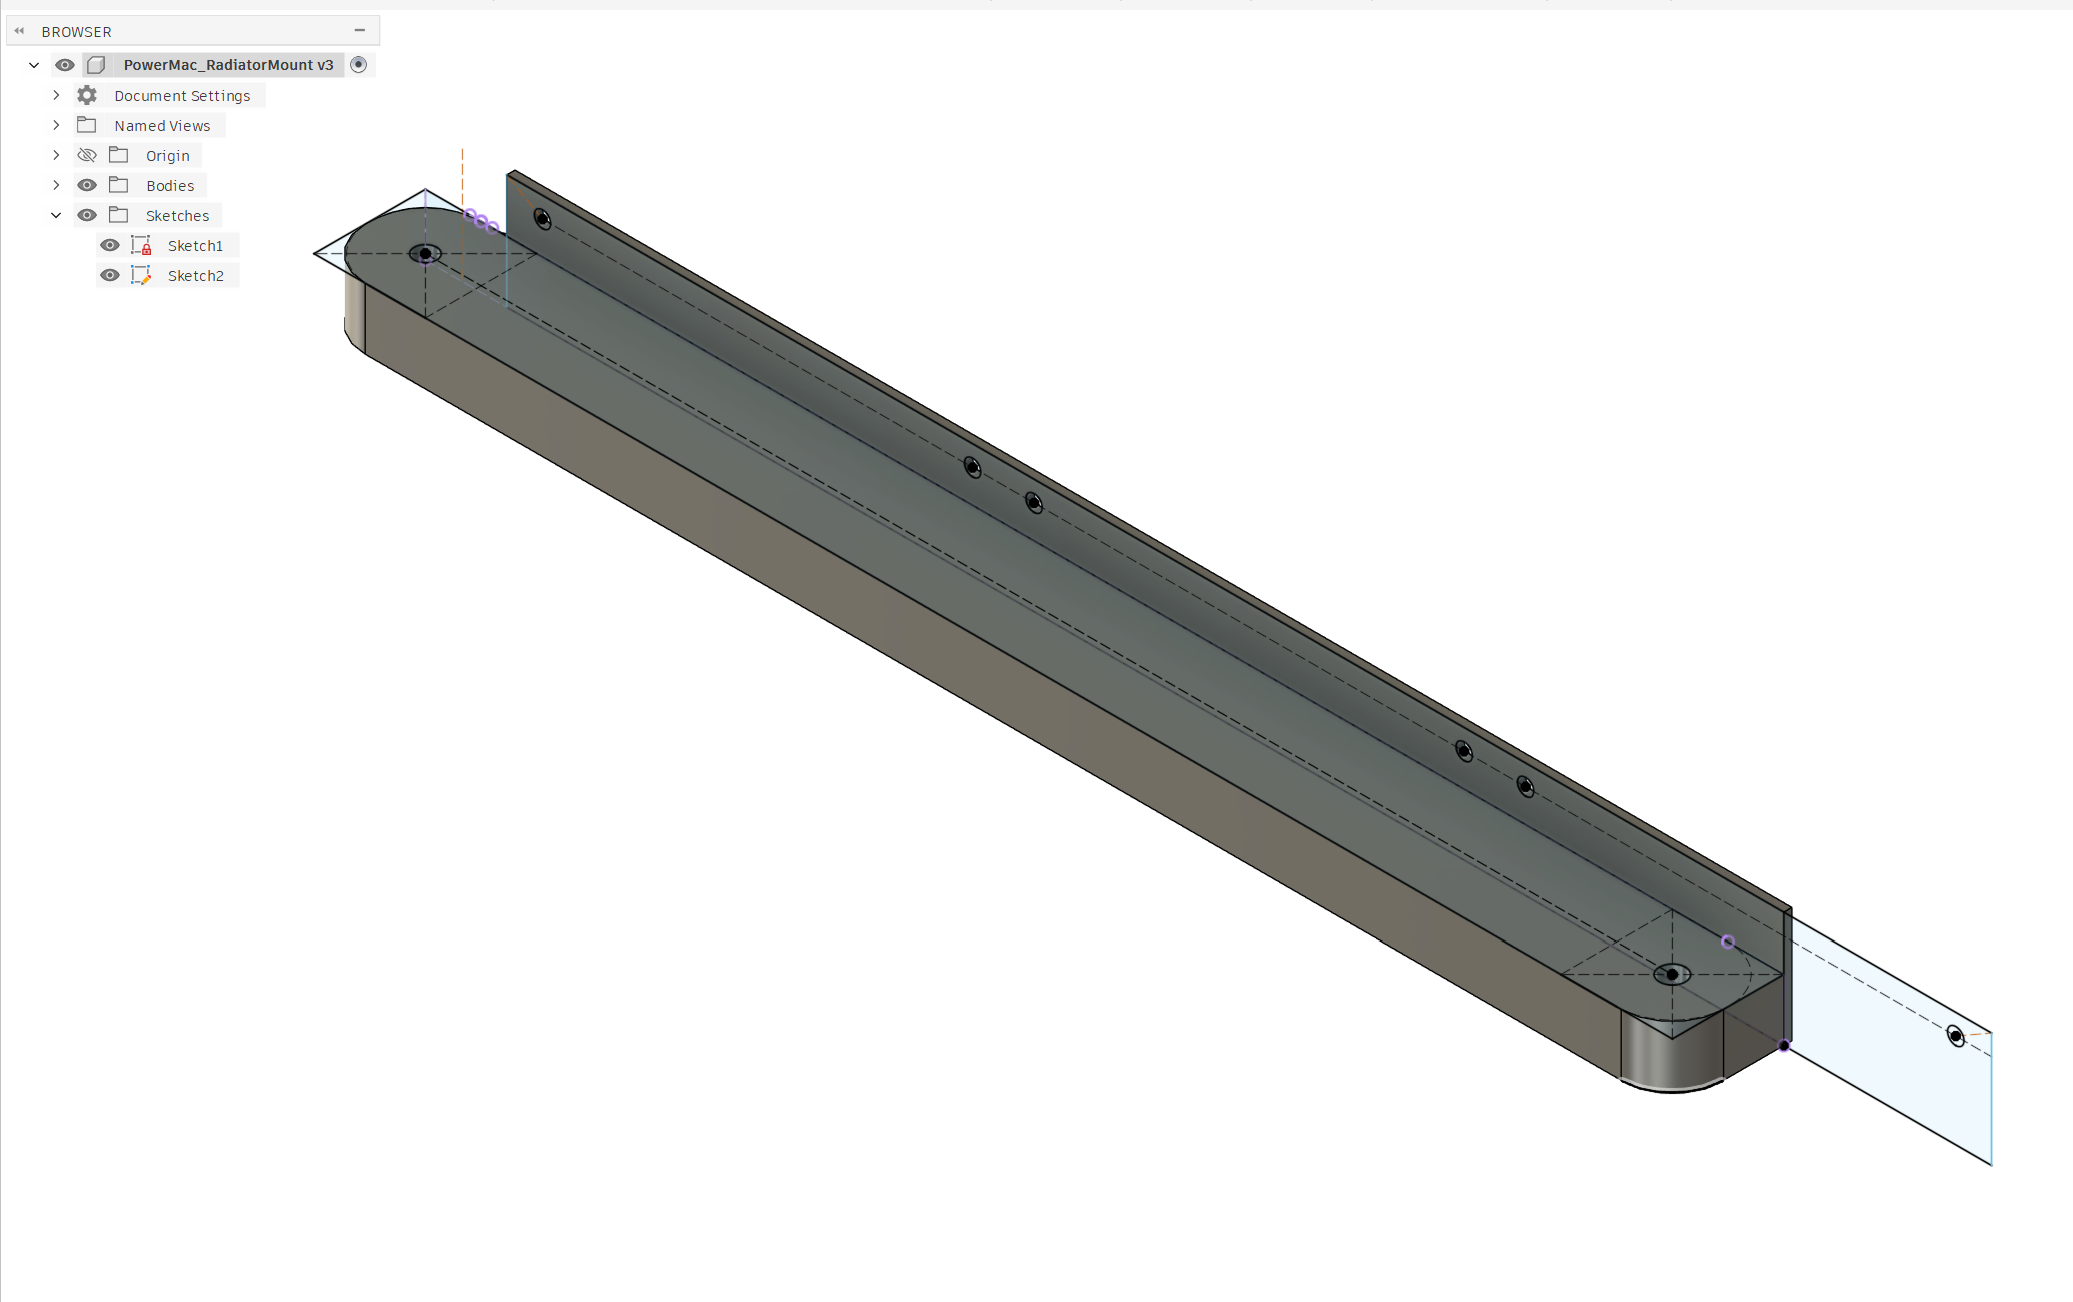

I wanted to make the bottom solid to dissuade hot air from just making a round trip back around the other side of the radiator. I designed it so that it would press fit over two of the original standoffs - and this worked a bit too well. While testing my first revision, it was so tight that the standoff broke off the case from me trying to get the bracket back off. It would have been pretty secure with just the one post still, but I epoxied this in at the same time as the motherboard tray for good measure.
This one took me two revisions as well; what a streak!
- step
- 142g
- total
- 530g
Power Woes
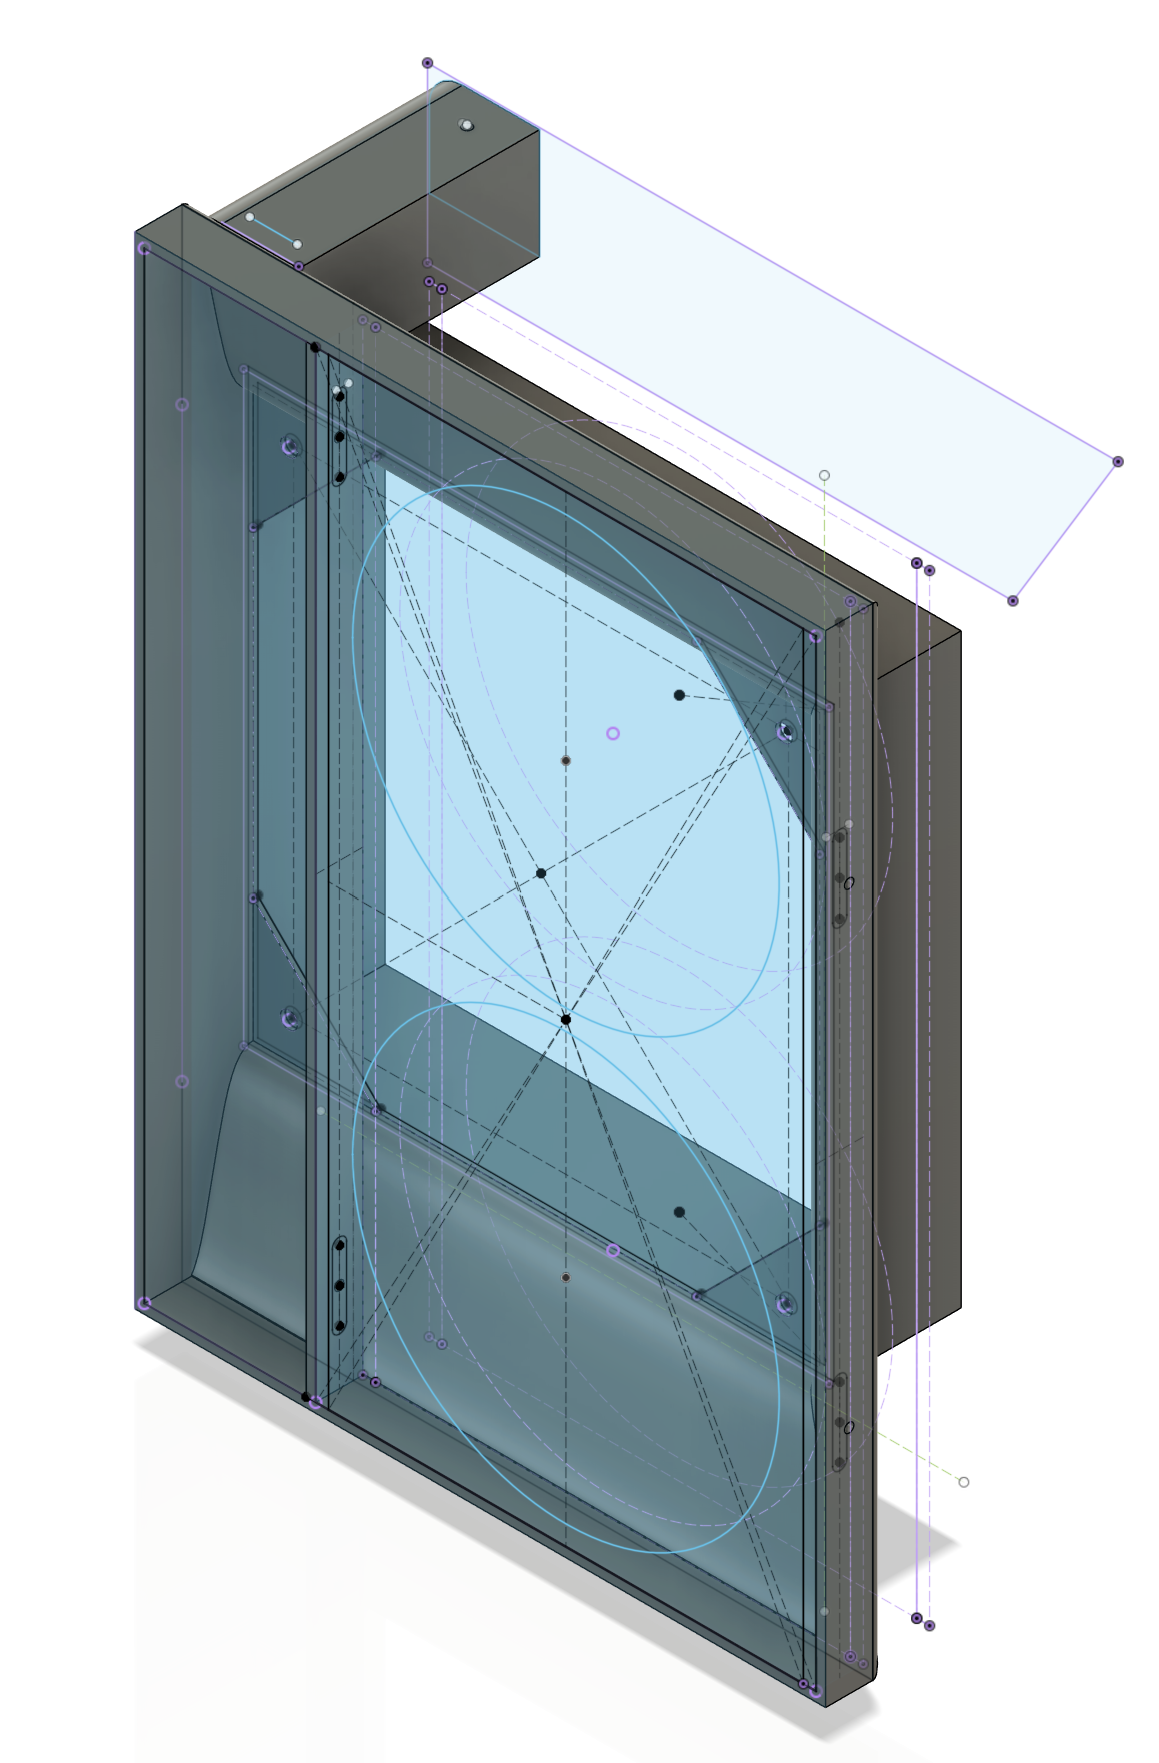
...aaaand now to the power supply. I bought a spare one off of my friend and it turned out to be an entire inch longer than what I had done my test fit with at the outset. This created some problems for me as the radiator hoses were already a very tight fit with the old (underpowered) PSU and I was now losing a bunch of space. Scarcity was rampant in my project's X-axis.
I ended up bastardizing a right-angle power cable that I found in the bin to make this work. I cut it short and soldered to a C14 socket that mounts on the back of the case using the holes in the cheese grater. I originally had something a little nicer changed, but alas, the space constraints got the better of me on that front.

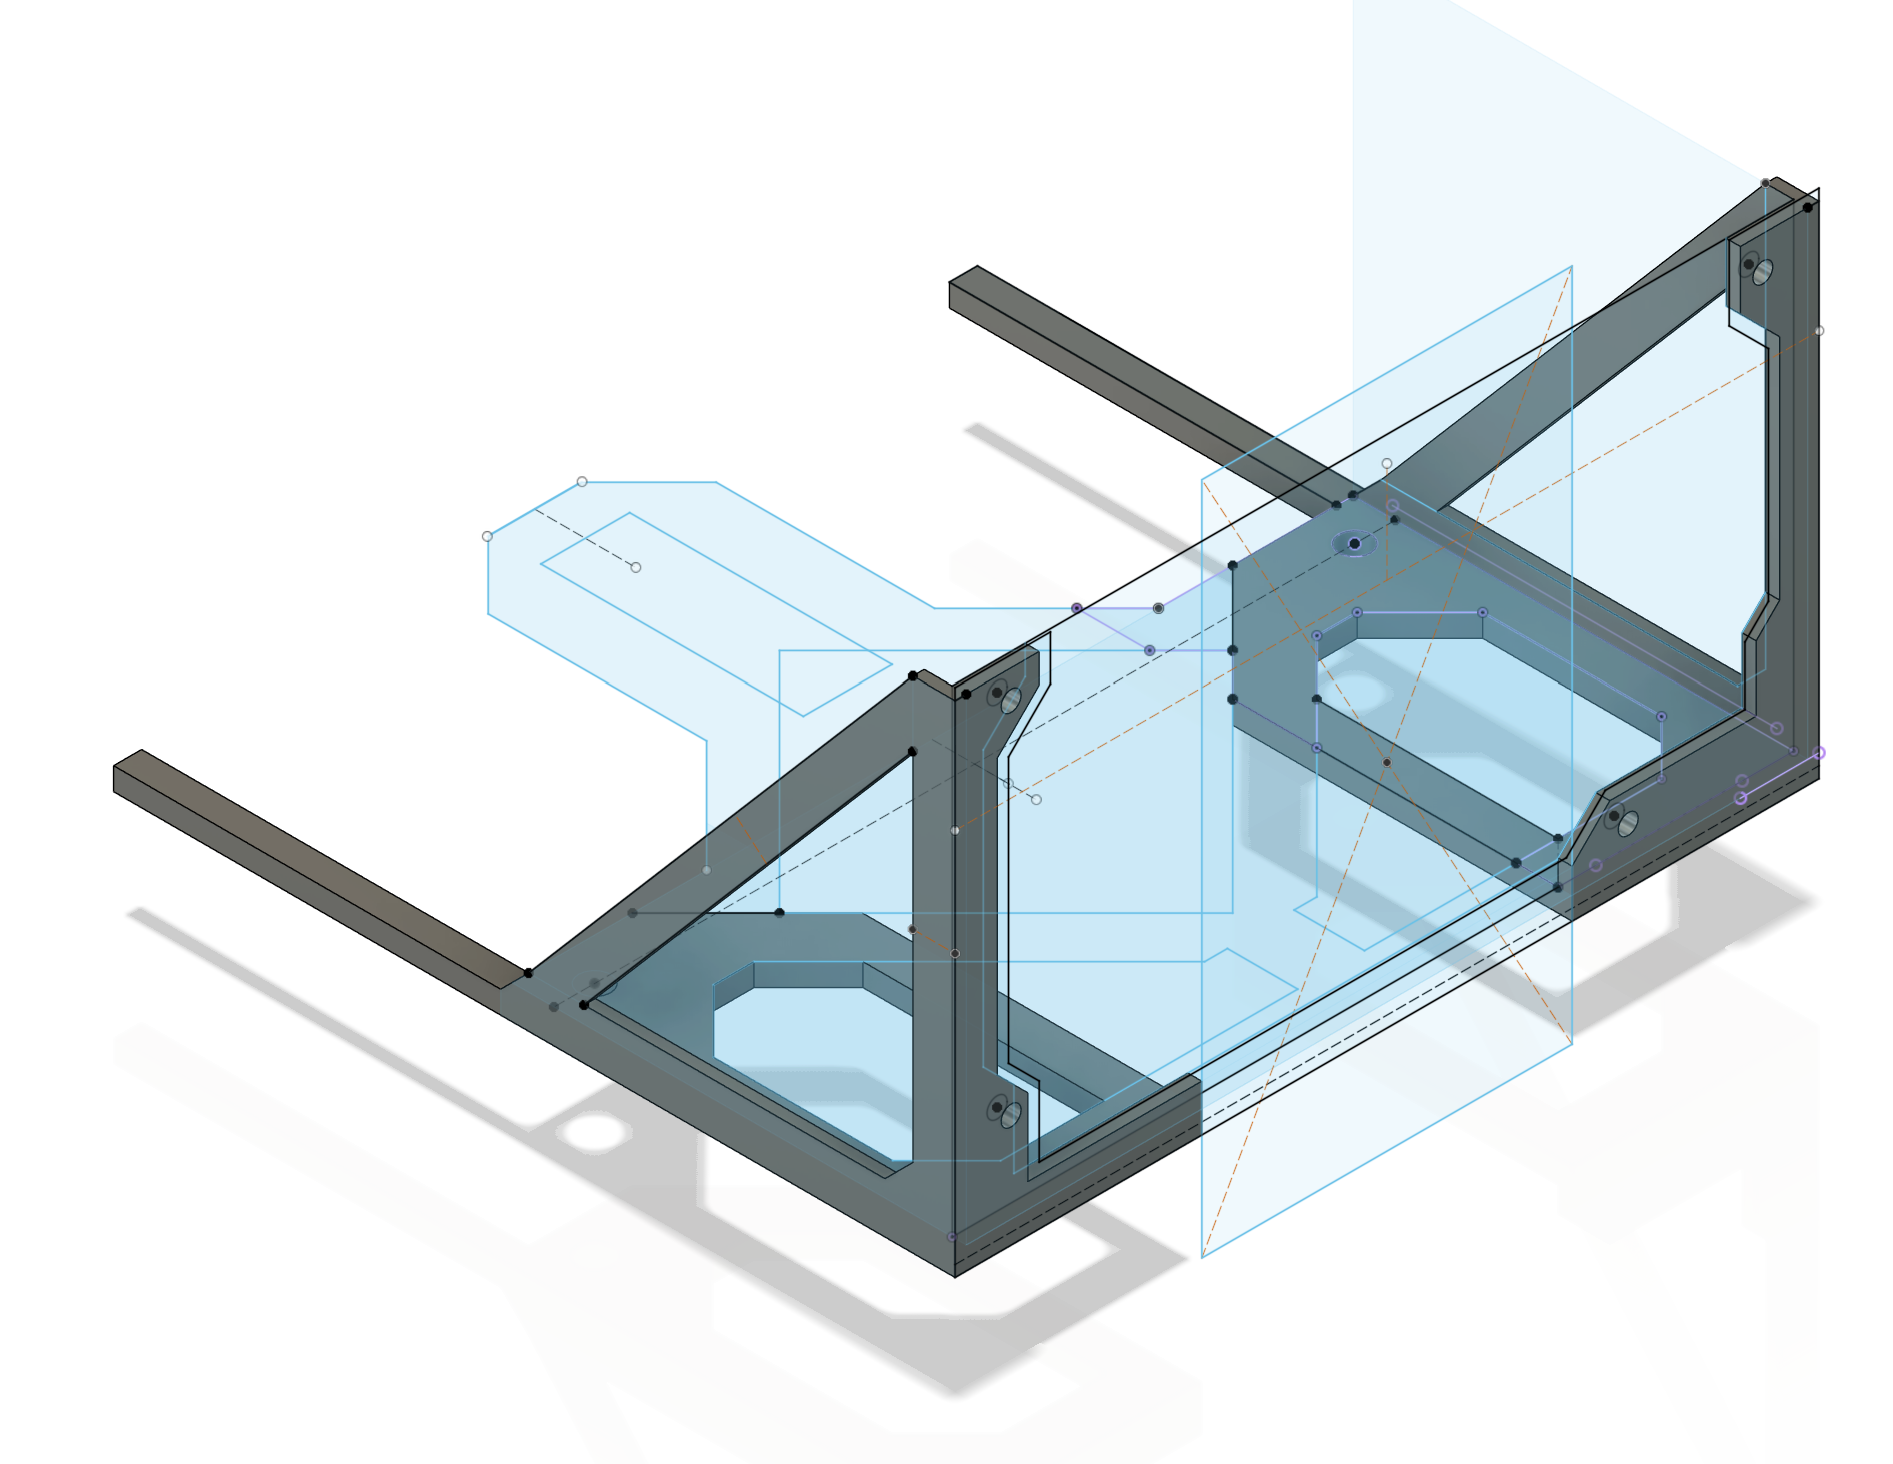
Getting this thing to fit in there was an absolute nightmare. The base was already an intricate 3D puzzle to assemble and it was like having negative space to get this PSU in, even with the very slimmed-down power extension. I nearly caved and bought an SFX PSU but I prevailed in the end. I ended up going through 6 revisions on the design to get something that finally worked right.
Printing was difficult on this. I kept having issues with warping on early versions of the design, even with a preheated enclosure, dried out ASA, and a scorching-hot bed. I removed more and more material and came to the realization that I could adjust for tolerances a lot faster if I split the design into two pieces. I don't have a good picture of the final version, but I have no intention of disassembling this thing unless absolutely necessary, so in there it will remain.
The brackets get some M4x4 brass threaded inserts that line up with factory holes on the bottom of the case. It has those two for support and is also right up against the fan shroud, so it's surprisingly secure in place.
- step
- 212g
- total
- 742g
I/O & Cable Management
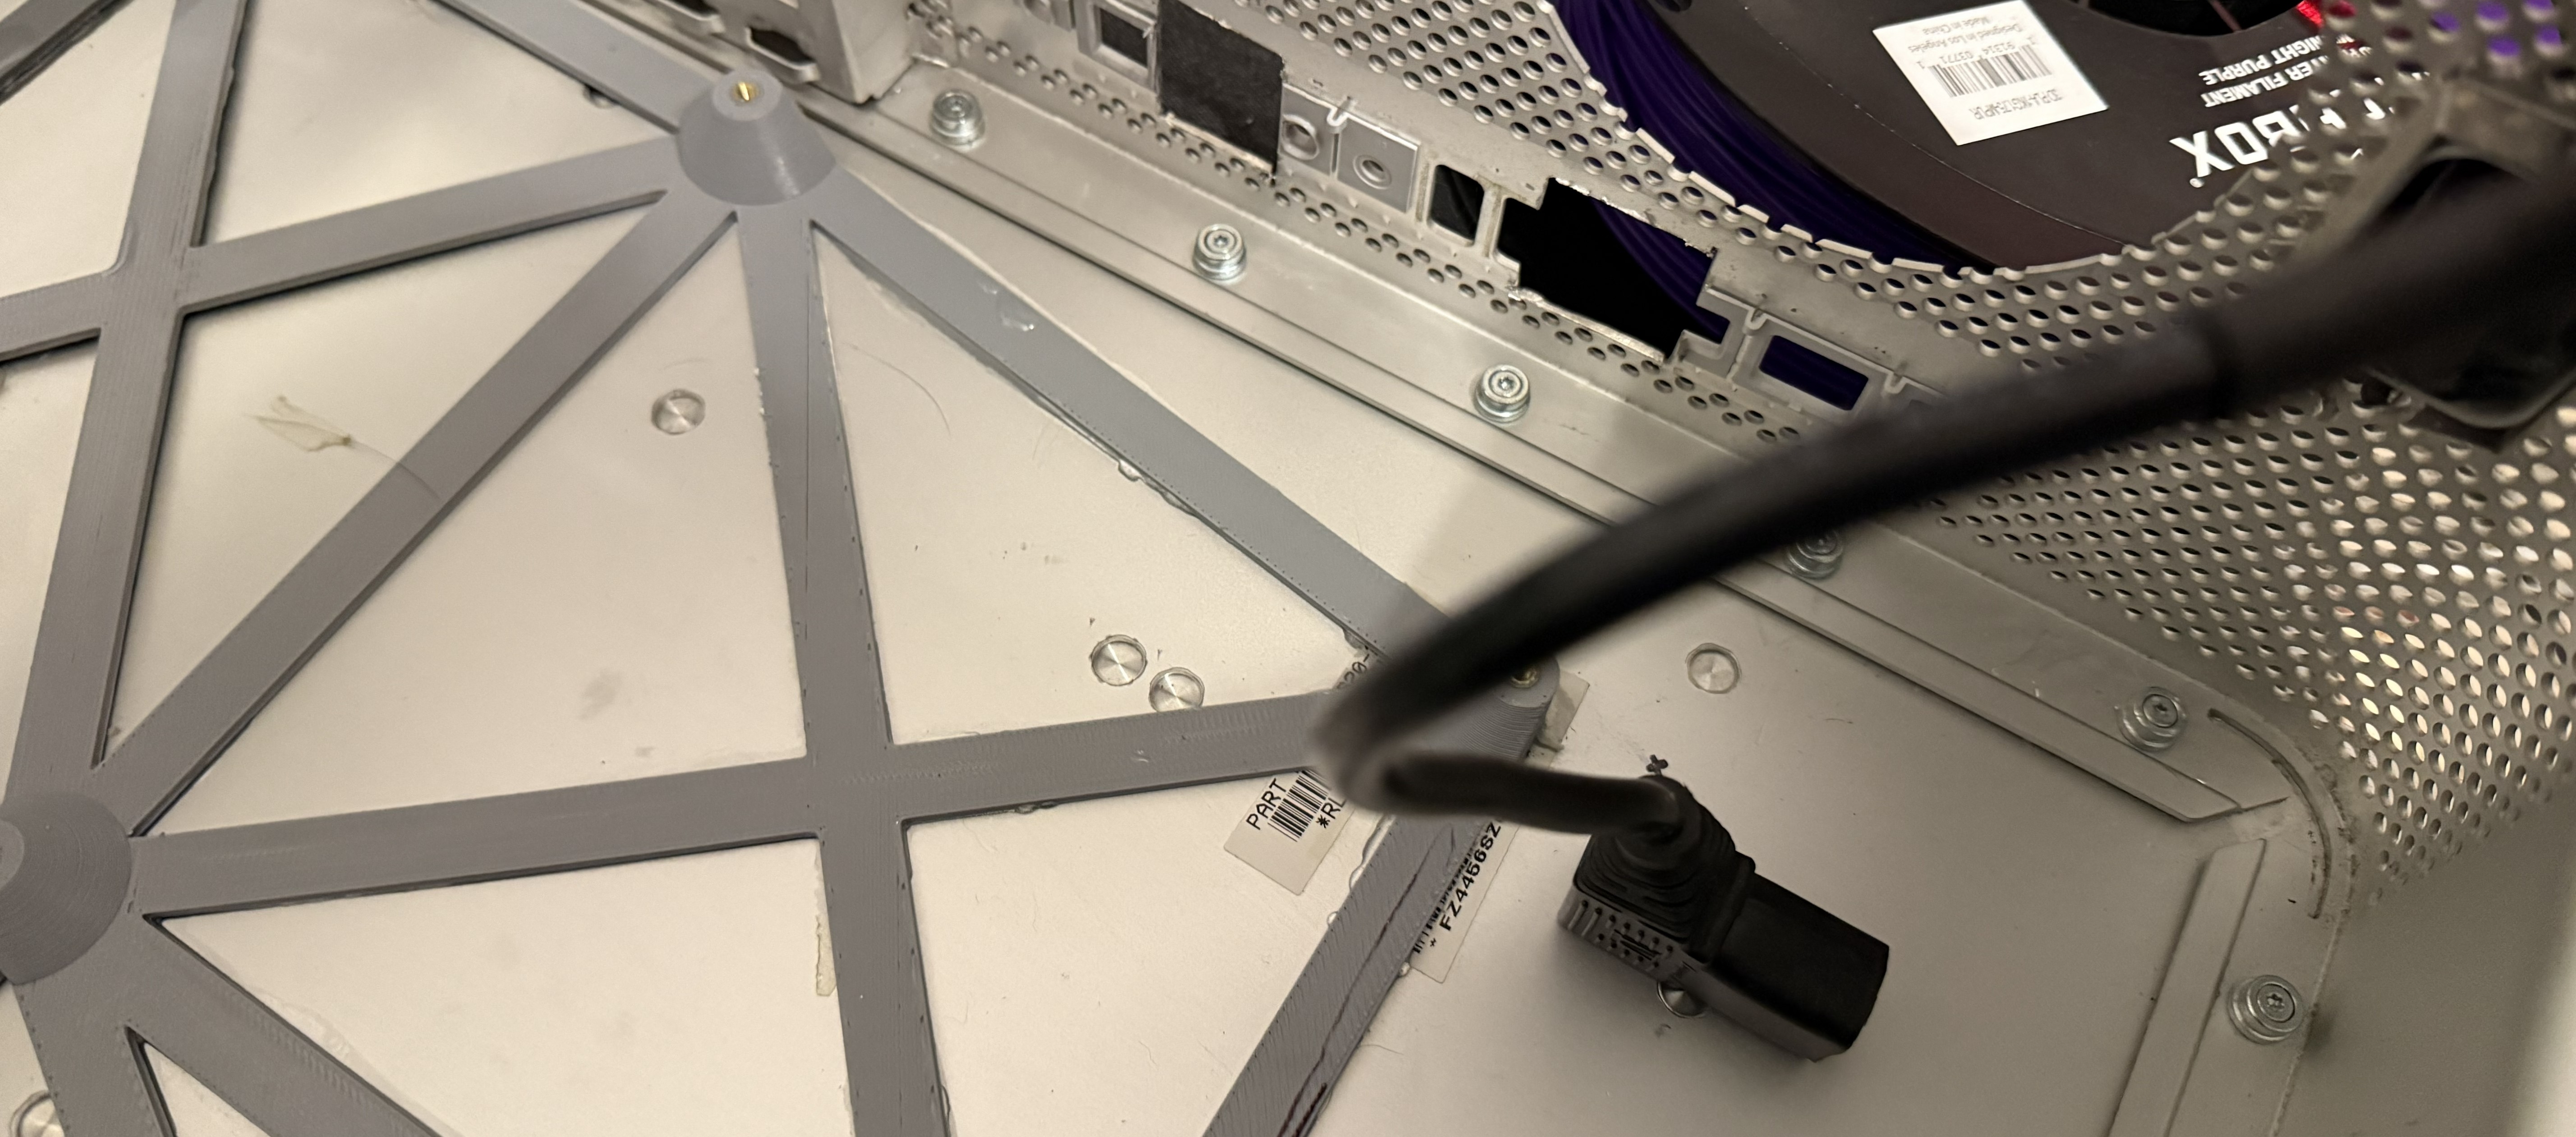
There was information online about the front panel headers but it was ever so slightly incomplete for my uses. I probed everything with a multimeter to make sure each pin was what I expected, luckily Apple appeared to use largely standard connectors on the other end. The main thing here is that the FireWire port's ground needs to be connected in order for the power button to function. I don't have a FireWire card in this PC (I have some but haven't ever seen that header on one of my cards), so I did some soldering to pull that ground from the USB connector.


I realized that I had a mistake in that the front panel cable could not reach up to the headers on the motherboard so I ended up holding a 1/4" ratchet extension in some pliers and heating it up with a torch to melt a notch to grant the cable passage through the radiator bracket.
For the rear I/O shield, I cut it out using a 3" cut-off disc and a piece of wood clamped to the case to act as a fence of sorts. I printed a simple trim piece to go around this to keep fingers away the sharp edges.
- step
- 47g
- total
- 789g
Prettying Things Up
I wanted to make a couple of little vanity plates to wrap things up. The one on the radiator is functional and it makes sure the rad pulls fresh air from the front that it is so far away from instead of just drawing back in hot air from the other side. I tried something new here: laser-cut a pattern and laminated two sheets together. I filled the hole with some epoxy resin with some mica powder mixed in. I just used regular cheap wood engraving basswood sheets, and that kind of bit me when I went to sand it down. The veneer layer on this is quite thin, so I wore through it in a couple spots. I'd love to go back and redo this with some solid wood if I can find a cheap source locally. It mounts up to the radiator using some little brackets I modeled.
- step
- 8g
- total
- 797g
It was really important to me to keep an optical drive in here, otherwise I could have removed the entire top shelf and made things a lot easier on myself. I have a BD-50 burner in there and wanted to put a little something on it. In 2011 I was watching a Chris Pirillo stream where he talked about meeting Steve Jobs at an Apple Store in California. He introduced himself and said what an honor it was, then Steve's response was "Great, great. Buy an iMac with a SuperDrive." That clip has lived rent-free in my head ever since, so I wanted to put some sort of SuperDrive branding in here.
The original dual G5 plate screws into the exhaust bracket and I cut a bigger hole in the acryllic panel (there was a smaller hole cut a decade ago for the GPU power plugs to close things up. All the cables I just tucked away or stuffed into a sleeve to make one big snake.


Software
I thought about putting bazzite on this but we play some pretty vintage games at our LAN parties and I didn't want to be fussing around with getting the games working during the event. I installed a version of Tiny11 and then tried out a script called WinMac that installs a bunch of themeing applications, do not recommend. It installed way more stuff than I ended up wanting and seems to have broken my start menu after being uninstalled. But otherwise, classic wallpaperm, dock, and flurry screensaver à la Snow Leopard had me feeling pretty good. Project complete!
